A shingle roof should be an asset you barely think about. It keeps dry air inside, wet weather outside, and stands up quietly to sun, wind, and temperature swings. When I walk an older neighborhood and see 12-year-old roofs curling at the edges while a 22-year-old roof across the street still looks tidy and flat, I usually find the difference comes down to care. Not fancy products, not luck. Care. The choices owners make in maintenance, ventilation, and small repairs determine whether shingles reach the back end of their rated life or fall short by a decade.
This guide pulls from years of inspecting, repairing, and replacing shingle roofing in climates that range from coastal salt spray to high-elevation UV. It lays out what matters most for longevity, and how to act on it without turning roof care into a part-time job. A good shingle roof costs real money. Keeping it at its best is worth some attention and a few well-timed tasks.
Understand What You Actually Own
Shingle roofing isn’t all the same. The product type and the roof’s design set the baseline for longevity. Architectural asphalt shingles, sometimes called laminated or dimensional shingles, typically carry a 30 to 50 year limited warranty, though the real-world life most homeowners should expect runs 20 to 30 years depending on climate and ventilation. Three-tab shingles usually have shorter service lives. Fiberglass mats have mostly replaced organic mats, which helps with fire resistance and dimensional stability, but fiberglass shingles still depend on an asphalt binder whose lifespan shortens with heat, UV, and poor airflow.
Slope and orientation matter. Roofs with shallow pitch shed water more slowly and tend to age faster. South- and west-facing slopes absorb the most UV, so those planes develop granule loss and brittleness first. Complex roofs with lots of hips, valleys, and penetrations have more points that demand careful detailing, which means more chances for small failures if those details are neglected.
The underlayment and deck matter as much as the visible shingles. Properly installed synthetic or high-quality felt underlayment, ice and water shield along eaves and valleys in cold climates, and a sound deck with correct nailing patterns create a system that tolerates storms and temperature swings without loosening fasteners or letting wind drive water backward. If you have records from your roof shingle installation, keep them. Knowing the underlayment type, the nail length, and whether drip edge was installed helps troubleshoot later.
Ventilation and Insulation: The Silent Lifespan Multipliers
If I could fix just one chronic issue on typical houses, it would be attic ventilation. Heat build-up cooks shingles from below, driving off oils so the surface loses granules and the mat becomes brittle. Poor ventilation also leads to winter moisture problems and ice dams. Adequate intake and exhaust keep the roof sheathing cool, limit condensation, and stabilize shingle temperature.
Ridge vents paired with continuous soffit vents work well on most gable roofs, as long as baffles keep insulation from blocking airflow at the eaves. On hip roofs without long ridges, consider a combination of hip vents and adequate soffit area. Static box vents can work, but they require enough units and good placement high on the slope. Powered attic fans are a last resort, and only when intake is generous, otherwise they can depressurize the attic and pull conditioned air from the living space.
Insulation plays hand-in-hand with ventilation. Aim to meet or exceed your region’s recommended R-value while keeping clear air channels at the eaves. I’ve seen gorgeous shingle installations ruined in half a decade by packed insulation that choked off soffit vents, turning the attic into a sauna in summer. A small investment in ventilation adjustments during a roof shingle replacement often extends the life of the next roof more than any premium shingle upgrade.
Keep Water Moving
Water that lingers finds ways in. A shingle roof thrives when water sheds fast, gutters run clear, and roof-to-wall transitions are flashed right. Gutters clogged with leaves or grit back up under the drip edge, saturating the eaves. I’ve replaced fascia that rotted from the backside while the paint still looked fresh. Clean gutters and downspouts in spring and fall, more often under heavy tree cover. Confirm downspouts discharge far enough from the foundation to avoid splash-back onto lower roofs.
Flashing deserves more credit than it gets. The number of leak calls I’ve traced to failed step flashing far outweighs leaks through the field shingles. Step flashing must be individual pieces that interlace with each shingle course, not a single continuous strip. Kick-out flashing at the base of a roof-to-wall junction is essential to send water into the gutter rather than down the siding. If your home never had kick-out flashing, ask a shingle roofing contractor to add it before you need new siding, sheathing, and a mold remediation bill.
Valleys call for special attention. Open metal valleys with a W profile and sufficient width shed debris better and resist ice build-up. In wooded lots, closed-cut valleys can trap leaves longer, so plan on seasonal cleaning if those are part of your roof. Ice and water shield is cheap insurance in valleys and along eaves, especially in climates that see freeze-thaw cycles.
Maintenance That Actually Matters
There’s a difference between fussy upkeep and the handful of tasks that noticeably extend roof life. I’ll focus on the latter.
Walk the grounds after big storms and once each spring. A quick scan from multiple vantage points will tell you if any shingles lifted, if a branch gouged a slope, or if ridge caps look disturbed. You don’t need to climb a ladder for every check. A pair of binoculars or a high-resolution phone photo from the yard works.
Trim branches that overhang the roof and scour the surface during wind events. The constant rubbing wears off granules and opens the way for the sun to harden the asphalt. Limbs that overhang also give squirrels an easy route onto the roof where they love to chew ridge vents and lead flashings.
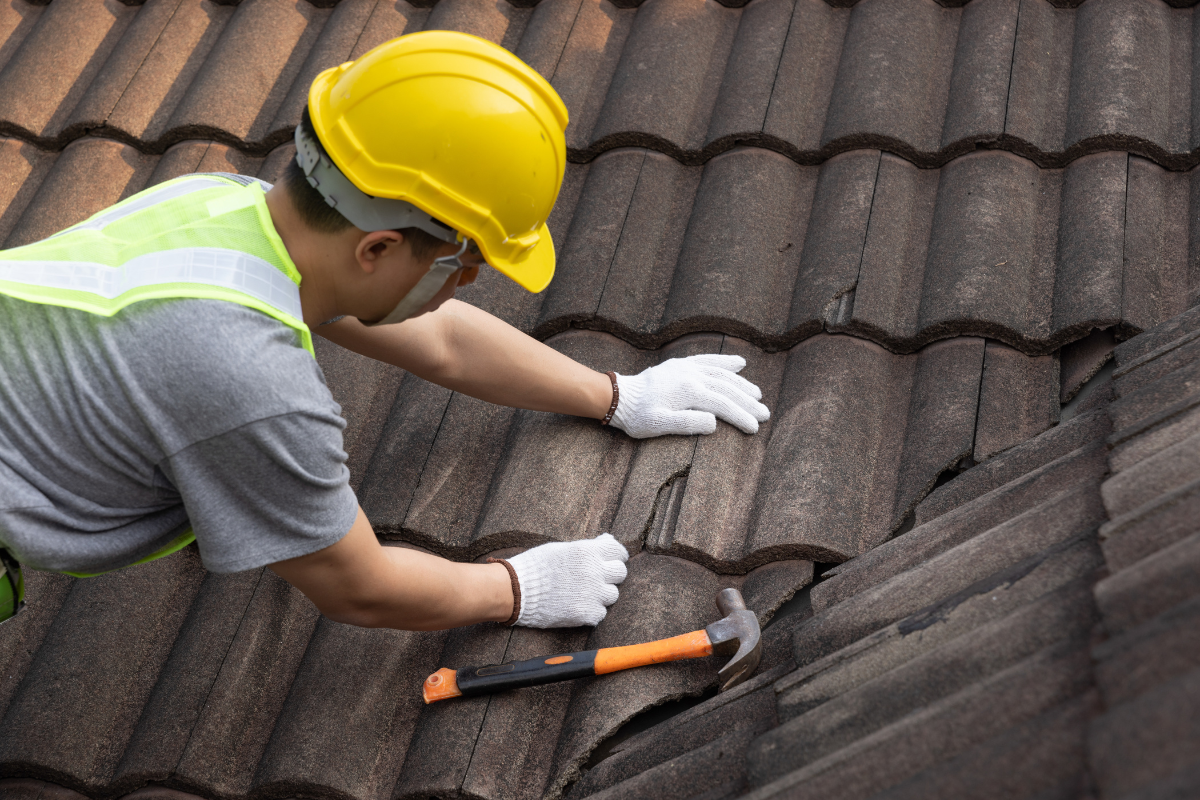
Address moss and algae early. In damp, shaded climates, algae leaves black streaks that are mostly cosmetic, though they can retain heat. Moss is more destructive, lifting tabs and trapping moisture. Use a cleaner approved for asphalt shingles, applied gently from the top down, and avoid pressure washers. Zinc or copper strips near the ridge inhibit growth as rainwater carries ions over the surface. If you install them during roof shingle repair or replacement, they’ll keep maintenance to a minimum for years.
Fasteners loosen over time, especially near ridges and eaves where wind gets leverage. During a professional inspection, a contractor can resecure lifted tabs with roofing cement sparingly applied beneath the shingle, then press and weight the area to set. DIY repairs are fine for small areas if you’re comfortable with roof safety, but use the right materials. Asphalt-compatible sealants and appropriate roofing nails, not deck screws or caulk.
Skylights, chimneys, and plumbing vents are leak magnets as they age. Flexible neoprene boots around vent stacks often crack after 8 to 12 years in high UV areas. Replacing a boot before it fails costs little compared to repairing ceiling drywall and attic insulation after a leak. Chimneys need proper counterflashing, not just a bead of mastic. If you see sealant lines around a chimney, that often means the flashing didn’t get done right the first time.
The Right Way to Clean a Shingle Roof
I cringe when I see someone with a pressure washer on a ladder blasting at shingles. High-pressure streams strip granules, shorten shingle life, and force water where it doesn’t belong. Gentle methods preserve the surface. Use a low-pressure sprayer with a cleaner formulated for asphalt shingles, or a mix recommended by the shingle manufacturer. Always wet landscaping below and rinse thoroughly afterward.
Clean from the top down, keeping foot traffic minimal, and never pry at moss with a scraper. Once the growth is dead, rain and wind do most of the removal. If your roof is steep or anytime footing is uncertain, hire a professional. Falls are the number one hazard for DIY roof work. A couple hundred dollars for a safe cleaning beats a hospital bill.
Shingle Repair vs. Replacement: Read the Signs
Choosing between roof shingle repair and full roof shingle replacement comes down to pattern and extent of wear. Isolated damage should be repaired quickly: wind-lifted tabs along an edge, a cracked vent boot, or a failed ridge cap. Those items are like getting a tire patch, not a new set of tires. When aging is widespread, such as granular loss across many planes, extensive curling, or lots of thermal cracking, replacement becomes the economical choice.
Look closely at granules. They protect the asphalt from UV. You’ll always find some granules in gutters, especially in the first month after installation and after hail. The red flag is bald spots or the texture of the shingle surface going from gritty to smooth in patches. When granule loss exposes the black asphalt underlayer, that area will age fast.
Curling at the tabs, especially upward cupping, signals heat and age. On a hot day, gently press a shingle corner. If it feels brittle and cracks, the roof is well into the replacement window. Widespread cracks or splits indicate thermal fatigue. In cold climates, recurring ice dams with stains along interior walls often signal inadequate eave protection or ventilation. Replacing shingles without solving the ice dam cause repeats the problem.
On newer roofs with hail, judge damage by functional impact, not just aesthetic bruising. Random granule divots are normal after small hail and often don’t shorten life. Deep bruises that feel soft with broken mats around the impact are a different story. A qualified inspector can cut a plug in an inconspicuous area to show whether the mat fractured. Insurance carriers usually look for a count of hits in a test square to determine coverage. Document promptly after storms.
Installation Quality: The Lifespan Foundation
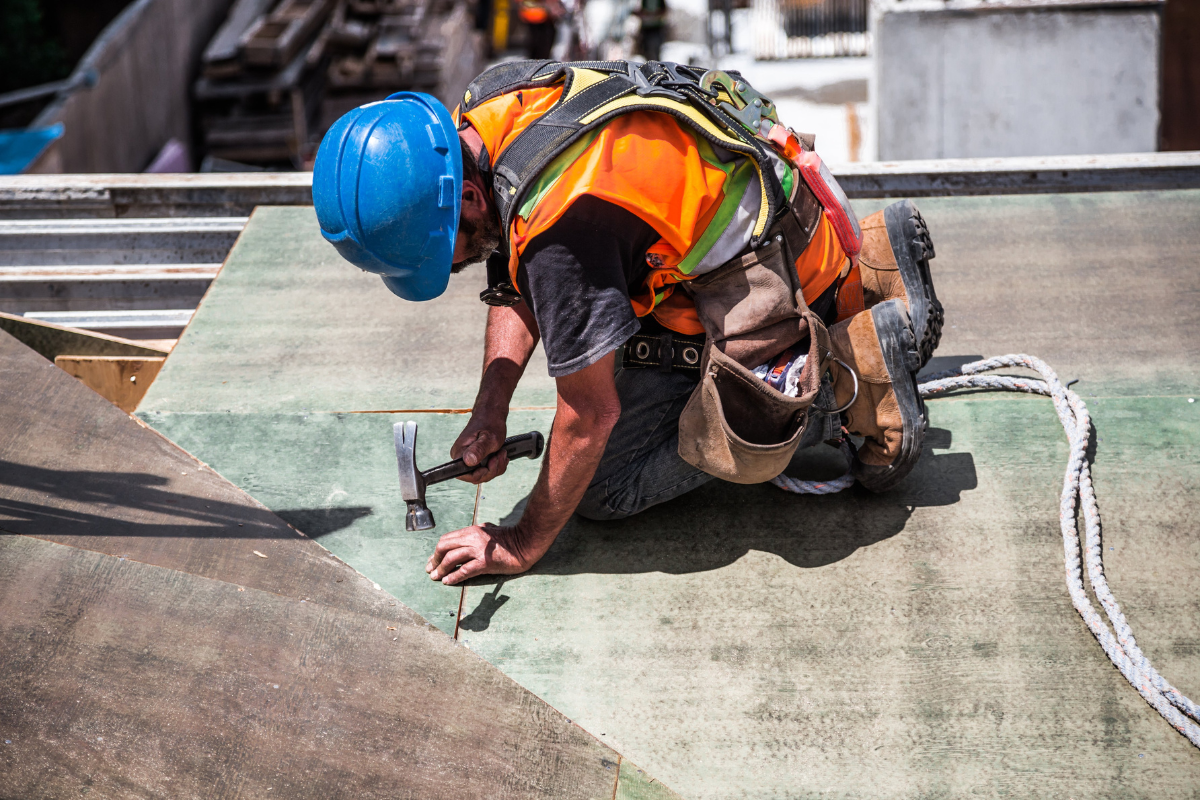
Even the best maintenance cannot overcome a poor roof shingle installation. I see three mistakes over and over that cut life short. First, improper nailing. Nails driven too high above the nail line or angled so they slice the mat will not hold through wind cycles. Nails driven into gaps between decking boards also lose grip with heat movement. The right nail length matters too. Nails should penetrate the deck by at least 3/4 inch or fully through if the deck is thinner, using ring-shank in windy regions for enhanced hold.
Second, inadequate underlayment in critical zones. Valleys, eaves in cold regions, and low-slope sections benefit from ice and water shield. Without it, wind-blown rain or dammed meltwater finds a way under the courses.
Third, lazy flashing. Step flashing must be properly layered with each course of shingles. Chimney counterflashing should be cut into a mortar joint and regletted, not surface-glued. Pipe boots should be sized correctly and protected from squirrel damage where wildlife is aggressive, sometimes with a small metal collar over the boot.
If you are hiring a shingle roofing contractor, ask to see a sample of their nail placement on a mockup, inquire about their standard underlayment and valley method, and request that ridge ventilation, drip edge, and kick-out flashing be part of the scope. A roofer who welcomes those questions usually takes pride in details that add years to your roof.
Climate-Specific Tactics
No roof exists in a vacuum. Local weather dictates the stress profile.
Hot, high UV zones: Focus on ventilation and light-colored shingles. Lighter blends can run several degrees cooler at the surface, translating into less heat soaking into the mat. Ensure adequate intake to feed ridge vents, and consider a radiant barrier in the attic if your framing allows safe installation without blocking airflow.
Cold climates with snow: Ice and water shield at least 24 inches inside the warm wall from the eaves, often more for low-slope roofs. Keep attic humidity low to avoid frost under the deck. I like to see bath fans vented outdoors through the roof with insulated ducts and backdraft dampers, not into the soffit. Snow guards above doorways and lower roofs help prevent sliding slabs from tearing off gutters.
Coastal and high-wind areas: Uplift resistance is king. Choose shingles rated for higher wind speeds and confirm enhanced nailing patterns. Starter shingles with factory-applied seal strips at eaves and rakes reduce edge lift. Stainless or hot-dipped galvanized flashing holds up better where salt spray corrodes fasteners.
Heavily wooded lots: Plan for more frequent moss and debris management. Metal valleys and wire-mesh gutter guards that you can easily remove and clean work better than fine screens that clog and are hard to clear. Trim branches to let sun and breeze reach the roof. The difference in drying time can be the difference between light algae streaks and thick moss mats.
What a Professional Inspection Should Cover
A yearly inspection by a roofer you trust is inexpensive compared to surprise leaks. The best inspections look beyond the shingle surface. Expect them to check ridge vent integrity, soffit airflow, and look for signs of deck movement like popped nails in the attic. They should probe soft spots around penetrations, confirm the condition of pipe boots and flashing, and walk valleys to feel for underlayment adhesion.
I carry a moisture meter and a thermal camera for suspect areas. A stain in the ceiling below a valley might come from condensation on a cold nail, not a leak. Or it could be a flashing pinhole. The tools help us avoid chasing ghosts. When we find issues, a good roofer explains options plainly, from minor patch to system fix, with costs and risk spelled out. That level of candor builds the kind of relationship that pays off when you need fast storm response.
When Repairs Make Sense
Not every defect points to a new roof. Strategic repairs extend life while you plan and budget. Here are the repair types that consistently deliver value without creating more problems.
- Replace individual damaged shingles by carefully loosening the adhesive strip with a flat bar, removing nails from the row above, sliding in the new shingle, and renailing in the manufacturer’s nail line. Keep sealant use minimal and under the shingle, not smeared on top. Install new pipe boots or retrofit collars over aging ones. A simple galvanized or copper storm collar snugged with a bead of compatible sealant around a sound boot can buy several years. Add kick-out flashing at roof-to-wall intersections that missing it. This protects siding and sheathing and reduces long-term water intrusion. Rework chimney flashing with proper step and counter pieces rather than smearing mastic. Done once, done right, and leaks disappear. Reinforce attic ventilation by clearing soffit blockages and adding baffles. Improving airflow costs less than replacing baked shingles and helps the whole house.
These repairs avoid tearing up large roof areas and focus on vulnerable points. The key is workmanship. If the repair looks messy from the ground, it was likely messy in the details too.
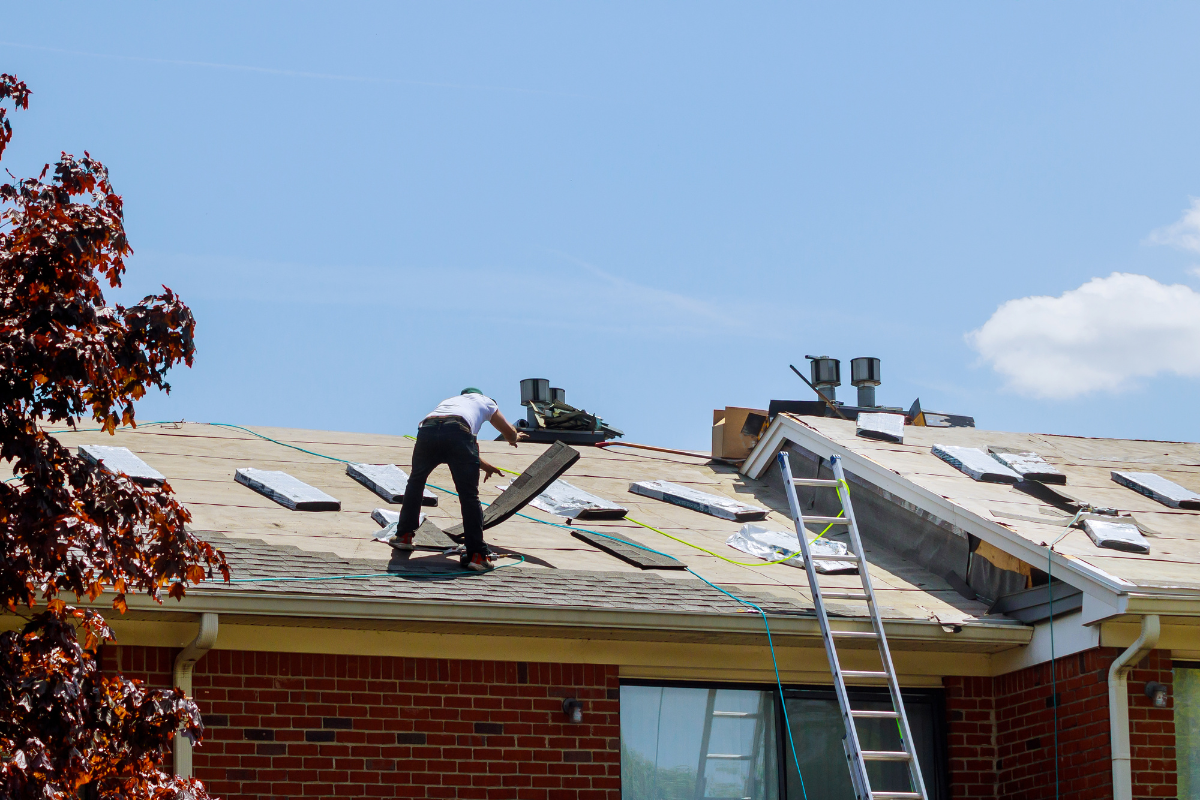
Planning for Replacement Without Waste
Even the best cared-for shingle roof eventually reaches the end of its service life. Planning ahead lets you get multiple bids, choose materials deliberately, and time the work for good weather. If you start to https://www.google.com/maps/place/Express+Roofing+Supply/@25.9948714,-80.1666639,17z/data=!3m1!4b1!4m6!3m5!1s0x88d9ab108fc5d417:0x204a6f9320b88b32!8m2!3d25.9948714!4d-80.1666639!16s%2Fg%2F11vt0cyxb5?entry=ttu&g_ep=EgoyMDI1MDgyNC4wIKXMDSoASAFQAw%3D%3D see widespread surface wear, patches of exposed mat, or brittle shingles that crack when handled, you are in the two to five year window. That’s the time to discuss options with a contractor rather than in a panic after a leak.
Ask about the roof system, not just shingle brand. A complete system includes compatible underlayment, ice and water shield where needed, starter strips, hip and ridge shingles, and proper ventilation components. Discuss whether your roof is a candidate for overlaying new shingles over old. In my experience, overlays save upfront money but reduce life and hide deck problems. A full tear-off lets you inspect and correct decking, add ice protection, and confirm fastener hold. Most homeowners who plan to stay put choose tear-off for the peace of mind and the longer horizon.
Consider ridge vent upgrades or a switch to a more effective profile. Verify soffit vent area in square inches matches or exceeds ridge vent capacity. If your attic lacks air channels, specify baffles as part of the job. These adjustments cost little compared to the total but have outsized impact on longevity.
Warranty Reality Check
Shingle warranties look impressive on paper, with long durations and algae-resistance clauses. Read the fine print. Many warranties require correct roof shingle installation by certified contractors and adequate ventilation, and they prorate heavily after the initial period. They often cover shingles only, not labor or disposal, and can be voided by improper maintenance or additional roof installations such as solar mounts without approved flashing.
This doesn’t mean warranties are worthless. It means they are a backstop for product defects, not a guarantee against poor installation or harsh conditions. Choose a shingle roofing contractor whose workmanship warranty is meaningful, written, and honored locally. The company that answers the phone in five years matters more than a manufacturer in another state if your issue turns out to be a flashing error rather than a shingle defect.
Solar, Satellite Dishes, and Other Roof Add-ons
Anything that penetrates a shingle roof must be flashed correctly. I’ve chased more leaks from satellite dish mounts than from storms. If you must mount equipment on the roof, insist on mounts designed to integrate with shingles and flashed with metal and gaskets, not lag bolts with goop. Better yet, mount dishes on a wall bracket and run the cable under the eave. For solar, use a mounting system with flashed standoffs and trained installers. A roof loaded with poorly sealed penetrations is a roof on a short timeline.
Be mindful of traffic. Installers walking repeatedly on the same paths wear granules prematurely, especially on hot days when asphalt is soft. Ask crews to use padded walkways and distribute loads. Good solar installers already do this. If you plan to replace the roof soon, schedule solar after the new roof goes on, not months before.
The True Cost of Neglect vs. Care
I inspected two similar homes built the same year. House A had its gutters cleaned twice a year, a ridge vent cleared of hornet nests once, and a small shingle patch at a tree impact after a windstorm. House B never cleared gutters, had frequent ice dams, and saw moss creep an inch thick on the north slope. House A replaced its roof at year 24 by choice, not necessity. House B called during a January thaw with leaks at two valleys and needed emergency work, then a full roof at year 14. The cost difference over time was large, but the real price was stress, moldy insulation, and damage to interior finishes.
Care doesn’t need to be complicated. Most of what truly matters can be scheduled on a calendar and done in an afternoon or handled by a pro on a yearly visit. And when you do need roof shingle repair, address it promptly. Small holes and loose tabs do not stay small for long once wind and water get a foothold.
A Seasonal Rhythm That Works
Roof longevity improves with a steady, light touch rather than occasional heroic efforts. Here is a simple cadence I recommend to homeowners who want predictable results without fuss.
- Early spring: Walk the property after the last snow, clear gutters, look for lifted ridge caps, check vent boots, and trim branches before leaf-out. Early summer: Quick visual review for algae or moss, schedule a gentle cleaning if needed, and confirm adequate attic airflow during hot days. Early fall: Clean gutters, flush downspouts, ensure kick-out flashing isn’t obstructed by siding or sealant, and verify insulation hasn’t blocked soffit vents. After major storms: Scan for missing shingles or debris in valleys, and call for shingle roof repair if anything looks off. Taking photos helps with insurance if required. Every two to three years: Have a professional inspection to address flashing, nails, and ventilation details that casual checks can miss.
This rhythm keeps the roof system on your side, not working against you. It also turns big surprises into small line items.
Choosing the Right Contractor When You Need Help
When the time comes to hire, look past the yard sign and the lowest bid. A good shingle roofing contractor shows up with references, proof of insurance, and a clear scope. They talk about ventilation and flashing, not just shingles and colors. They are comfortable explaining nail patterns, underlayment choices, and how they’ll protect your landscaping. They will tell you what happens if they uncover bad decking and how change orders get approved.
Ask about crew supervision. A hands-on foreman present daily is a far better sign than a salesman who disappears once the contract is signed. Request documentation photos, especially around hidden details like valleys and chimneys. That record becomes part of your home’s maintenance history and gives you leverage if questions arise later.
The Payoff: Quiet Reliability
A shingle roof that lasts past its expected life isn’t an accident. It is the sum of unobtrusive choices: clean water paths, correct airflow, quick repairs, and careful installations. It means the roof blends into the background of your life, which is exactly where it belongs. When the day eventually comes for roof shingle replacement, you get to make that choice on your schedule, with time to compare materials and crews, rather than with pots on the floor catching drips.
If you care for the system, the system cares for you. A few hours a year, a professional eye now and then, and attention to details like flashing and ventilation will do more for your shingle roof than any miracle coating or gimmick. That is how you extend the life of your shingle roofing, and how you keep it quietly doing its job, season after season.
Express Roofing Supply
Address: 1790 SW 30th Ave, Hallandale Beach, FL 33009
Phone: (954) 477-7703
Website: https://www.expressroofsupply.com/
FAQ About Roof Repair
How much should it cost to repair a roof? Minor repairs (sealant, a few shingles, small flashing fixes) typically run $150–$600, moderate repairs (leaks, larger flashing/vent issues) are often $400–$1,500, and extensive repairs (structural or widespread damage) can be $1,500–$5,000+; actual pricing varies by material, roof pitch, access, and local labor rates.
How much does it roughly cost to fix a roof? As a rough rule of thumb, plan around $3–$12 per square foot for common repairs, with asphalt generally at the lower end and tile/metal at the higher end; expect trip minimums and emergency fees to increase the total.
What is the most common roof repair? Replacing damaged or missing shingles/tiles and fixing flashing around chimneys, skylights, and vents are the most common repairs, since these areas are frequent sources of leaks.
Can you repair a roof without replacing it? Yes—if the damage is localized and the underlying decking and structure are sound, targeted repairs (patching, flashing replacement, shingle swaps) can restore performance without a full replacement.
Can you repair just a section of a roof? Yes—partial repairs or “sectional” reroofs are common for isolated damage; ensure materials match (age, color, profile) and that transitions are properly flashed to avoid future leaks.
Can a handyman do roof repairs? A handyman can handle small, simple fixes, but for leak diagnosis, flashing work, structural issues, or warranty-covered roofs, it’s safer to hire a licensed roofing contractor for proper materials, safety, and documentation.
Does homeowners insurance cover roof repair? Usually only for sudden, accidental damage (e.g., wind, hail, falling tree limbs) and not for wear-and-tear or neglect; coverage specifics, deductibles, and documentation requirements vary by policy—check your insurer before starting work.
What is the best time of year for roof repair? Dry, mild weather is ideal—often late spring through early fall; in warmer climates, schedule repairs for the dry season and avoid periods with heavy rain, high winds, or freezing temperatures for best adhesion and safety.